우선 공식문서를 보고 프로젝트에 GoogleMaps에 관한 설정을 마쳐놓자.
💫 지도화면 띄워보기
1. API Key 등록
import SwiftUI
import GoogleMaps

@main
struct GoogleMapsTutorialApp: App {
    init() {
        GMSServices.provideAPIKey("YOUR_API_KEY")
    }

    var body: some Scene {
        WindowGroup {
            ContentView()
        }
    }
}
공식문서에서는 AppDelegate에서 API키를 등록하지만 SwiftUI에서 @main 어노테이션이 있는 객체의 init()에서 등록해도 된다.
2. GMSMapView를 UIViewRepresentable로 감싸기
import SwiftUI
import GoogleMaps

struct GMSMapViewRepresentable: UIViewRepresentable {
    func makeUIView(context: Context) -> GMSMapView {
        GMSMapView(frame: .zero)
    }

    func updateUIView(_ uiView: GMSMapView, context: Context) {

    }
}
GoogleMaps에서 제공하는 GMSMapView는 UIView프로토콜을 준수하기 때문에 SwiftUI에서 사용하기 위해 코드를 한번 감쌌다.
3. 지도화면 띄우기
import SwiftUI

struct ContentView: View {
    var body: some View {
        GMSMapViewRepresentable()
    }
}

struct ContentView_Previews: PreviewProvider {
    static var previews: some View {
        ContentView()
    }
}
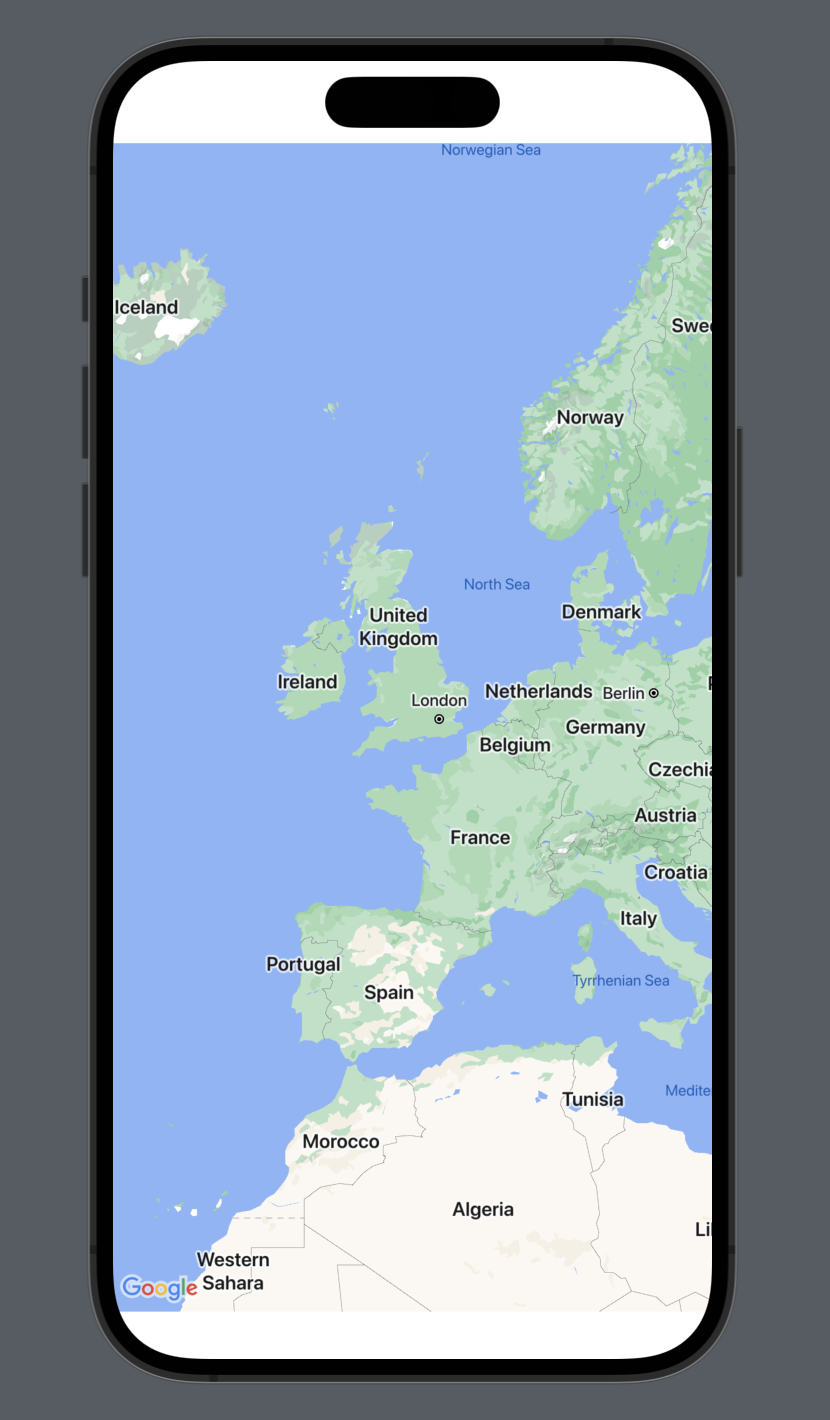
성-공!
+) 혹시 Previews에서 오류가 난다면 ContentView.swift 파일과 GMSMapViewRepresentable.swift 파일을 분리시켜서 해보자! 왜인진 모르겠지만 같은 파일에 있으면 프리뷰에서 오류가 난다.
✔️ GMSMapView: Google Maps가 띄워지는 화면
💫 지도에 마커찍어보기
1. GMSMapViewRepresentable 수정
struct GMSMapViewRepresentable: UIViewRepresentable {
    func makeUIView(context: Context) -> GMSMapView {
        let mapView = GMSMapView(frame: .zero)

        let london = GMSMarker(position: CLLocationCoordinate2D(latitude: 51.509865, longitude: -0.118092))
        london.title = "London"
        london.snippet = "UK"
        london.map = mapView

        return mapView
    }

    func updateUIView(_ uiView: GMSMapView, context: Context) {

    }
}
프리뷰에 런던이 떡하니 보이므로 런던에 마커를 찍어보기로! 우선 앞에서 만들었던 GMSMapViewRepresentable의 makeUIView를 약간 수정했다. GMSMapView를 상수에 저장하고 마커가 될 GMSMarker객체를 생성하고 mapView와 연결시켜주고 mapView를 리턴하면 끝! 다시 프리뷰로 가서 확인해보면..
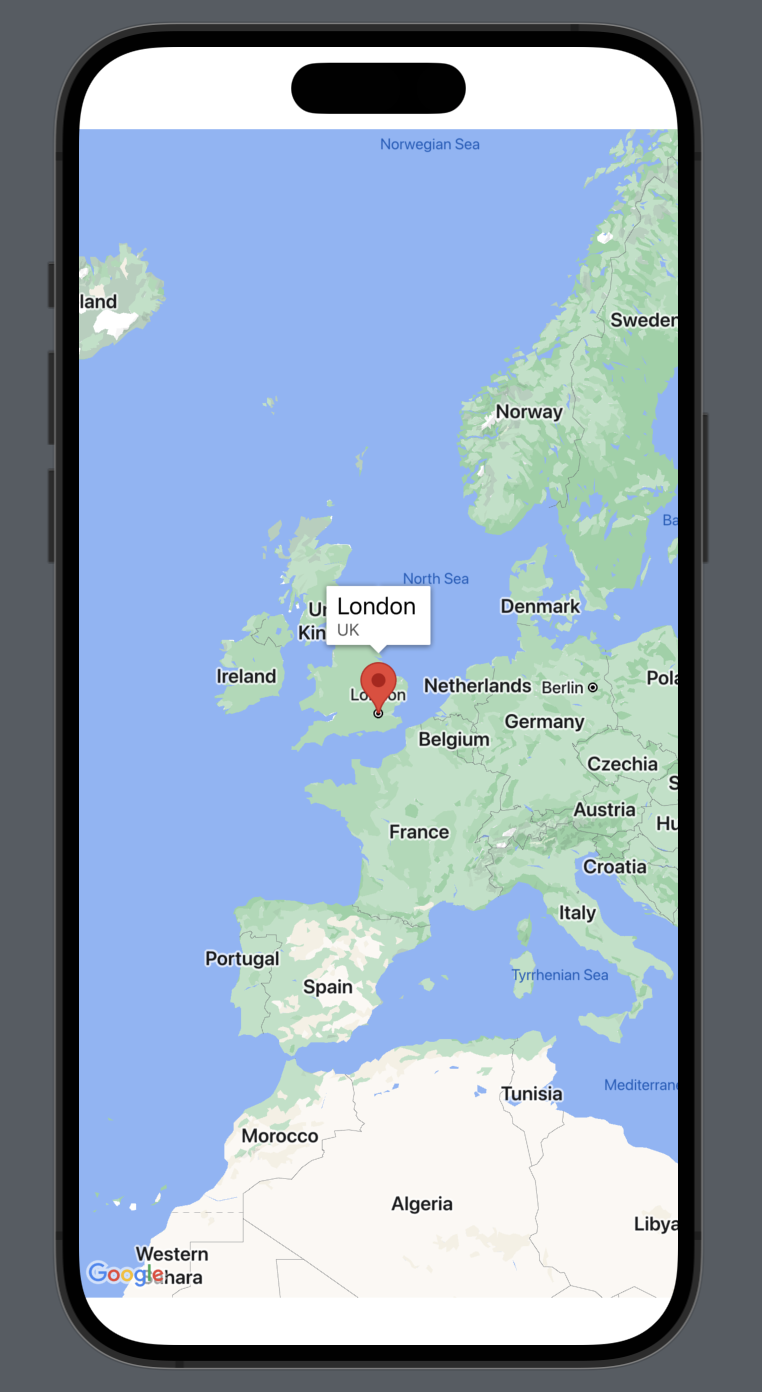
이렇게 런던에 마커가 찍혀있고 클릭해보면 위 코드에서 설정한 title과 snippet이 보이게된다.
✔️ GMSMarker: 지도에 표시될 마커 객체로 position을 꼭 입력해줘야한다.
💫 내 위치로 이동하기
1. GPS접근 권한 요청하기
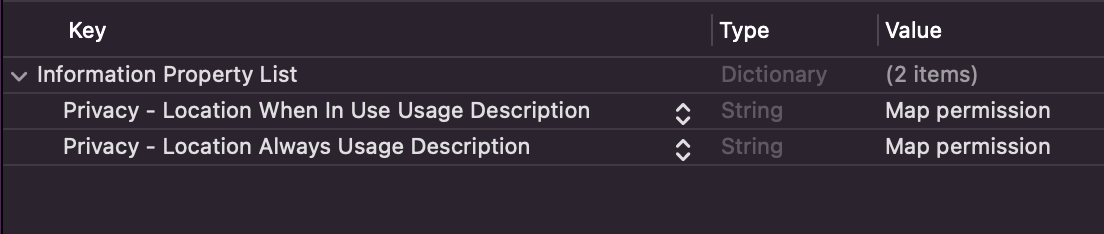
Info.plist에서
Privacy - Location When In Use Usage Description : 앱을 사용중일때만 허용 (포그라운드)
Privacy - Location Always Usage Description : 항상 허용 (백그라운드)
이 두개를 추가하고 설명을 간단히 적어주자.
2. GMSMapViewRepresentable에 CLLocationManager, Coordinator추가
struct GMSMapViewRepresentable: UIViewRepresentable {
    private let locationManager = CLLocationManager() // 👈 현재위치를 불러올 locationManager 추가
    private let mapView = GMSMapView(frame: .zero) // 👈 mapView를 전역변수로 설정

    func makeCoordinator() -> Coordinator {
        Coordinator(self)
    }

    func makeUIView(context: Context) -> GMSMapView {
    	// 기존 코드는 사용 x
        // TODO: 여기에서 기본 설정을 해야한다.
        return mapView
    }

    func updateUIView(_ uiView: GMSMapView, context: Context) {

    }
}

extension GMSMapViewRepresentable {
    final class Coordinator: NSObject {
        let parent: GMSMapViewRepresentable

        init(_ parent: GMSMapViewRepresentable) {
            self.parent = parent
        }
    }
}

extension GMSMapViewRepresentable.Coordinator: CLLocationManagerDelegate {
	// ...
}
현재위치를 불러올 locationManager를 추가하고 locationManager의 delegate를 사용하기위해 Coordinator코드도 추가해준다.
3. CLLocationManagerDelegate 작성하기
extension GMSMapViewRepresentable.Coordinator: CLLocationManagerDelegate {
    func locationManager(_ manager: CLLocationManager, didUpdateLocations locations: [CLLocation]) {
        let location: CLLocation = locations.last!
        print("Location: \(location)")

        let camera = GMSCameraPosition.camera(withTarget: location.coordinate, zoom: 15)

        parent.mapView.animate(to: camera)
    }
}
현재 위치를 가져오면 mapView에 넣고 화면을 이동시킨다. camera는 지도에서 현재 보고있는 화면에 대한 정보가 담겨있다.
4. delegate 연결 및 지도 설정하기
struct GMSMapViewRepresentable: UIViewRepresentable {
    ...

    func makeUIView(context: Context) -> GMSMapView {
        // locationManager 설정
        locationManager.desiredAccuracy = kCLLocationAccuracyBest
        locationManager.requestWhenInUseAuthorization()
        locationManager.startUpdatingLocation()
        locationManager.delegate = context.coordinator

        // mapView 설정
        mapView.settings.myLocationButton = true // 우측아래 내위치
        mapView.isMyLocationEnabled = true // 내위치 파란점으로 표시

        return mapView
    }

    ...
}
마지막으로 locationManager와 mapView를 makeUIView에서 설정을 하면 끝!
5. 확인해보기
우선 ContentView에서 프리뷰로 본다면 아마 계속 런던만 나올건데 프리뷰에서는 위치권한을 동의할 수 없기 때문이다. 그래서 시뮬레이터나 아이폰을 직접 연결해서 테스트 할 수 있다. 실제 기기같은 경우에는 문제가 되지 않는데 시뮬레이터도 내 위치를 알 수 없다. 그럴땐 Xcode에서 시뮬레이터의 현재위치를 직접 바꿀수 있다. [Debug]탭 -> [Simulate Location] -> 지역선택
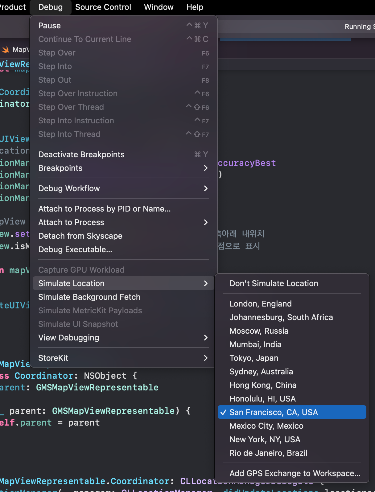
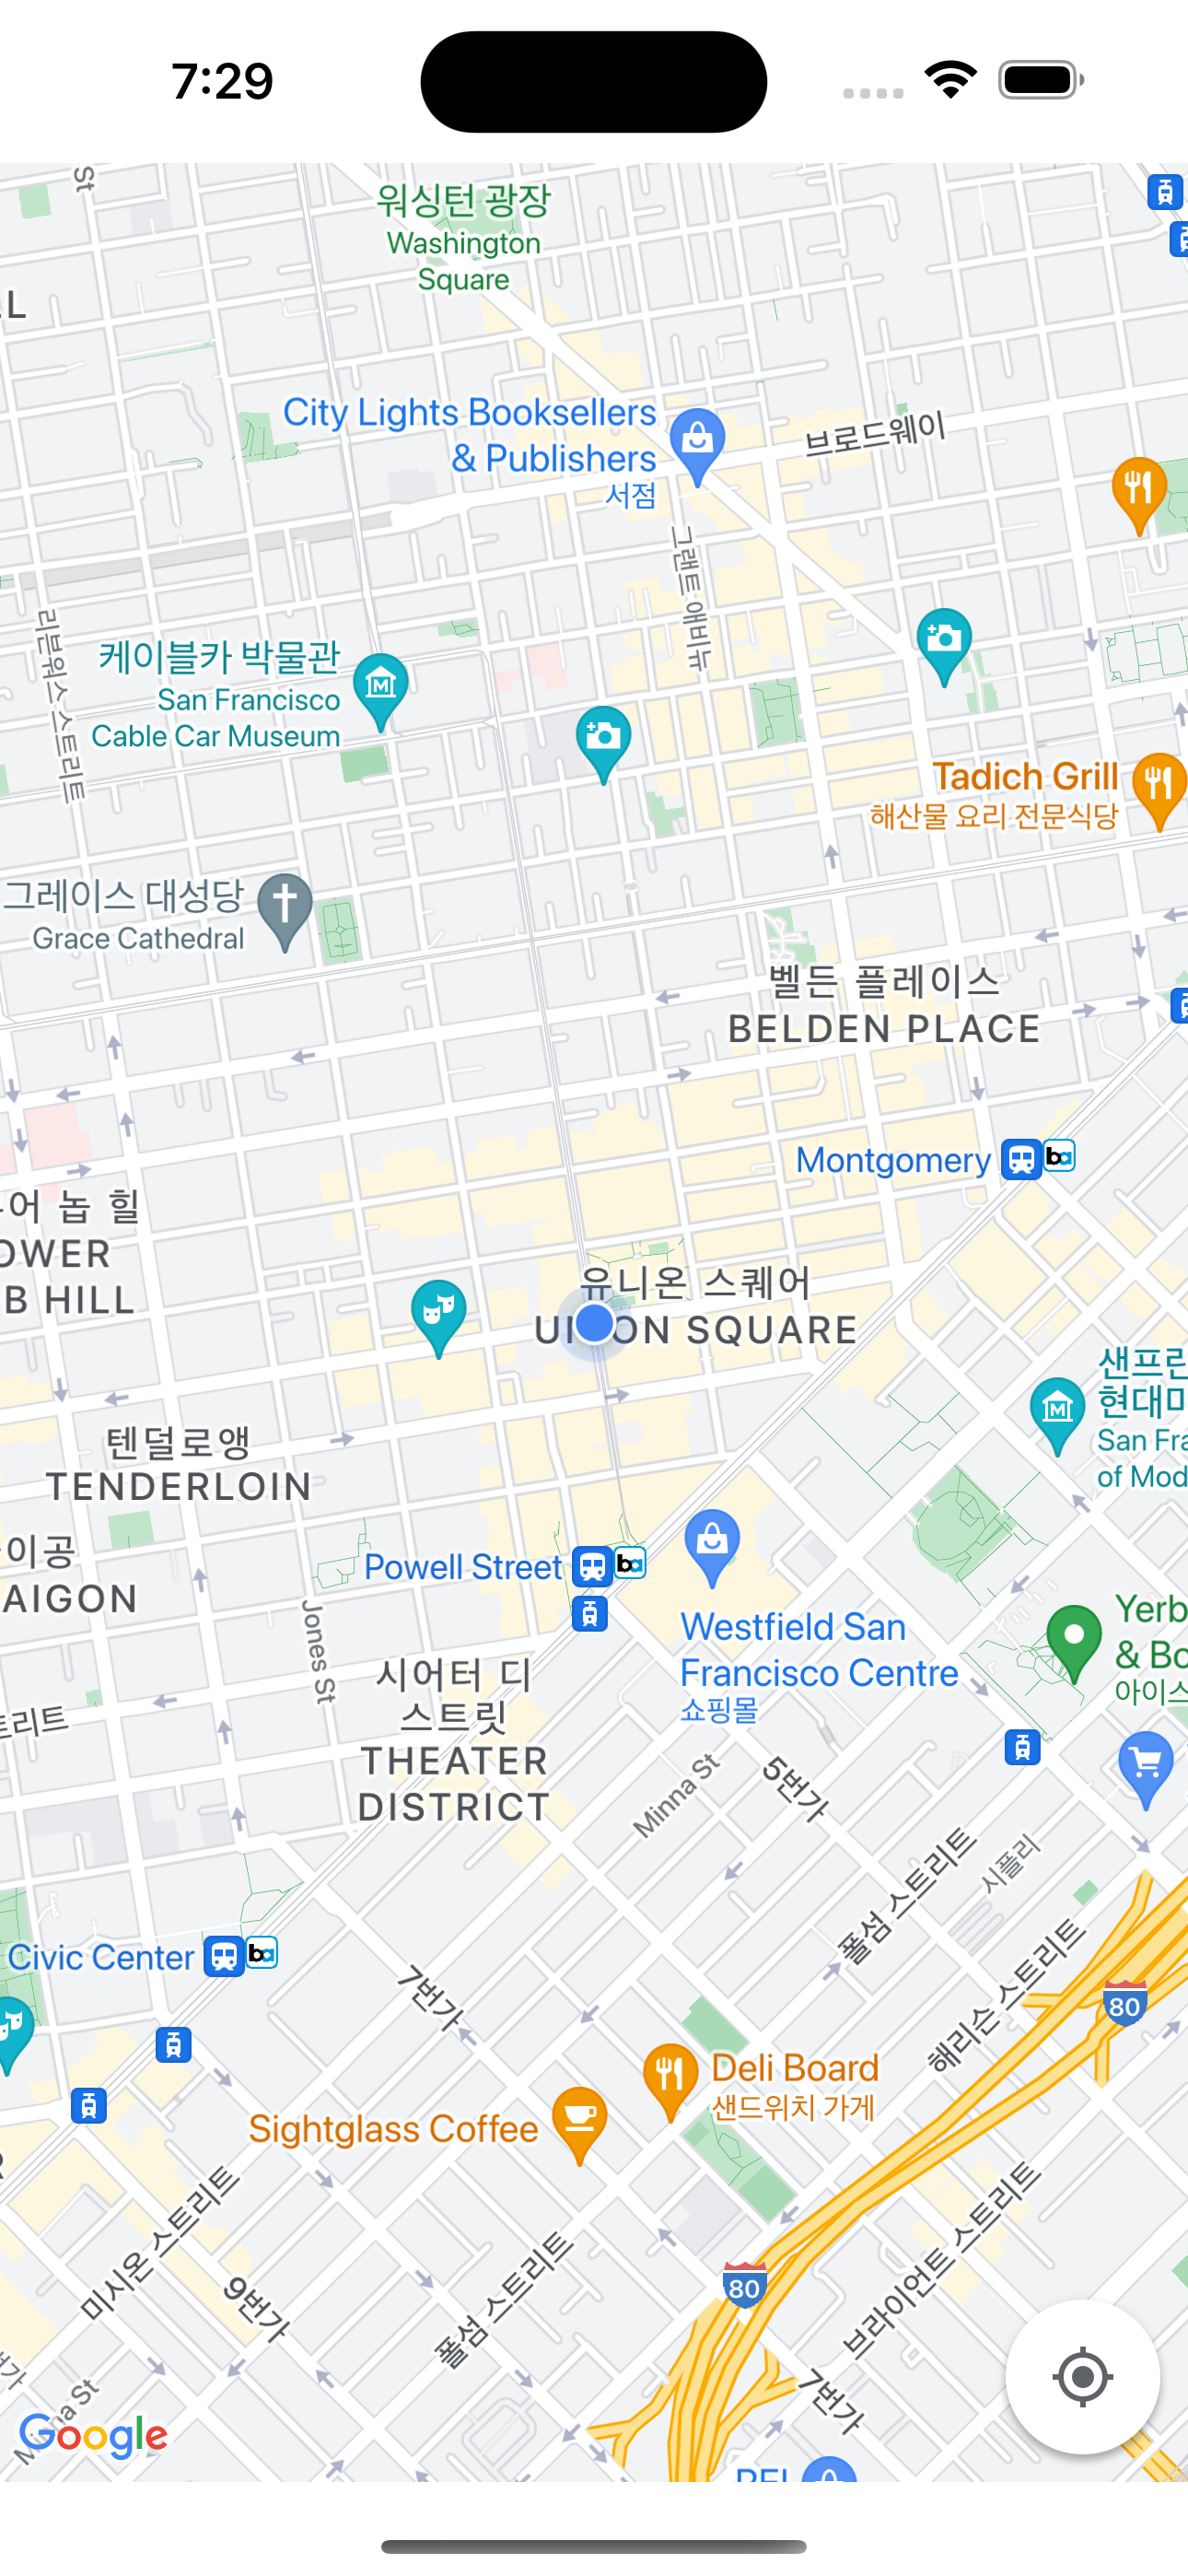
성공적으로 샌프란시스코에 있는 나의 위치로 화면이 바뀌었다.
✔️ GMSCameraPosition: 지도에서 화면의 일부의 정보를 담고있는 객체
'iOS > SwiftUI' 카테고리의 다른 글
| SwiftUI Bordering (inside, half, outside) (0) | 2023.10.06 |
|---|---|
| SwiftUI에서 GoogleMapsAPI 적용해보기 - 심화 (0) | 2023.02.22 |
| Alignment Guides (0) | 2022.07.11 |
| SwiftUI로 CheckBoxTreeView 만들기! (0) | 2022.07.01 |
| SwiftUI로 Countdown Timer 만들어보기 (0) | 2022.06.17 |


